Setting Up Your Private Business Email via IMAP in Outlook
In this article, we’ll walk you through the process of setting up your Private Business Email mailbox using the IMAP protocol in the Outlook client.
Understanding New Outlook
Yes, Outlook for Windows—also known as New Outlook—is the latest email client developed by Microsoft. To give you a better idea, here’s a closer look at what’s coming with New Outlook.
Note: In this guide, we’ll use nctest@name.com as an example email address.
Step-by-Step Setup Guide
First, open the Outlook (New) application on your Windows device.
Next, after launching Outlook, enter the Private Email address you’d like to add and press Continue.
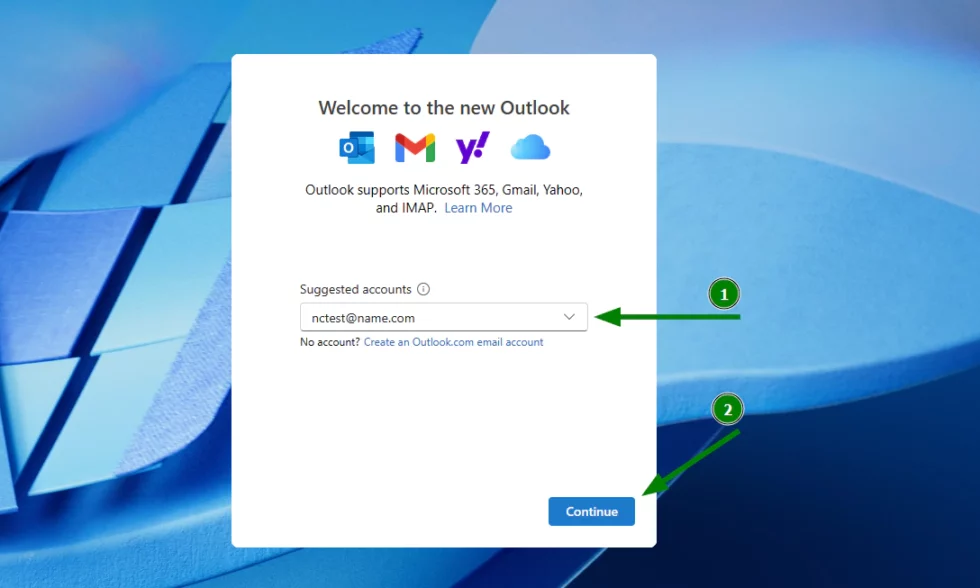
Tip: If you already have an email account set up in New Outlook, click Add Account to proceed.
Then, in the next window, click Show more to reveal the incoming/outgoing server settings.
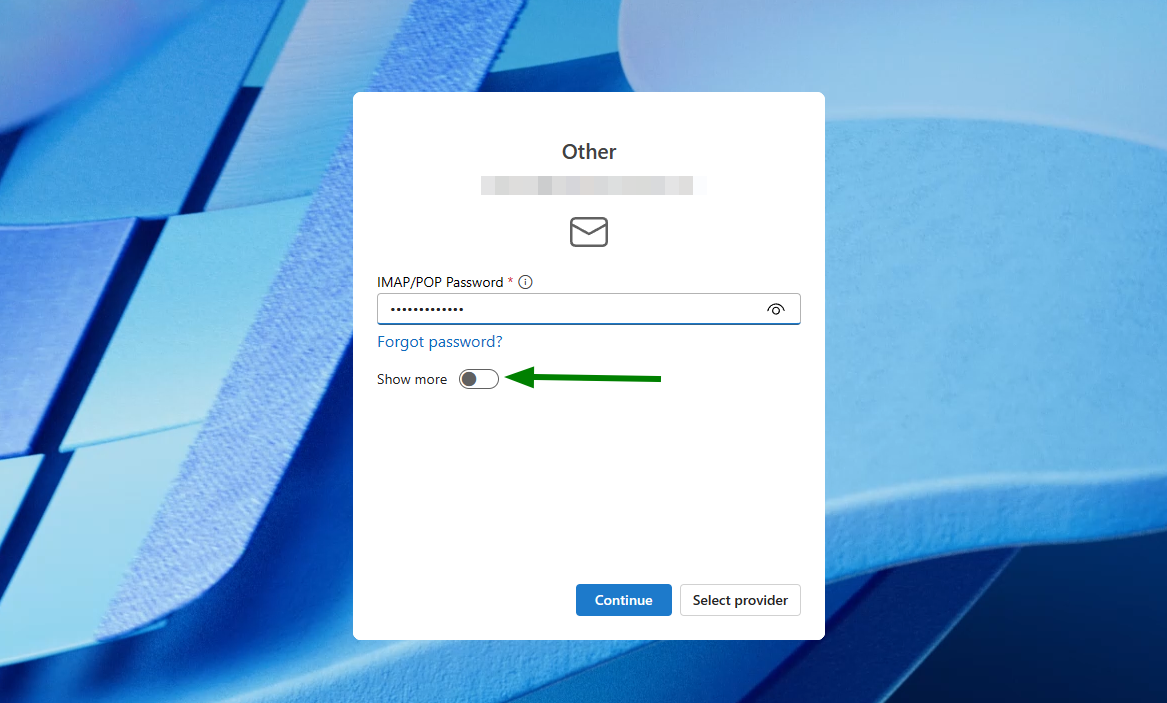
Note: New Outlook currently does not support the POP3 protocol.
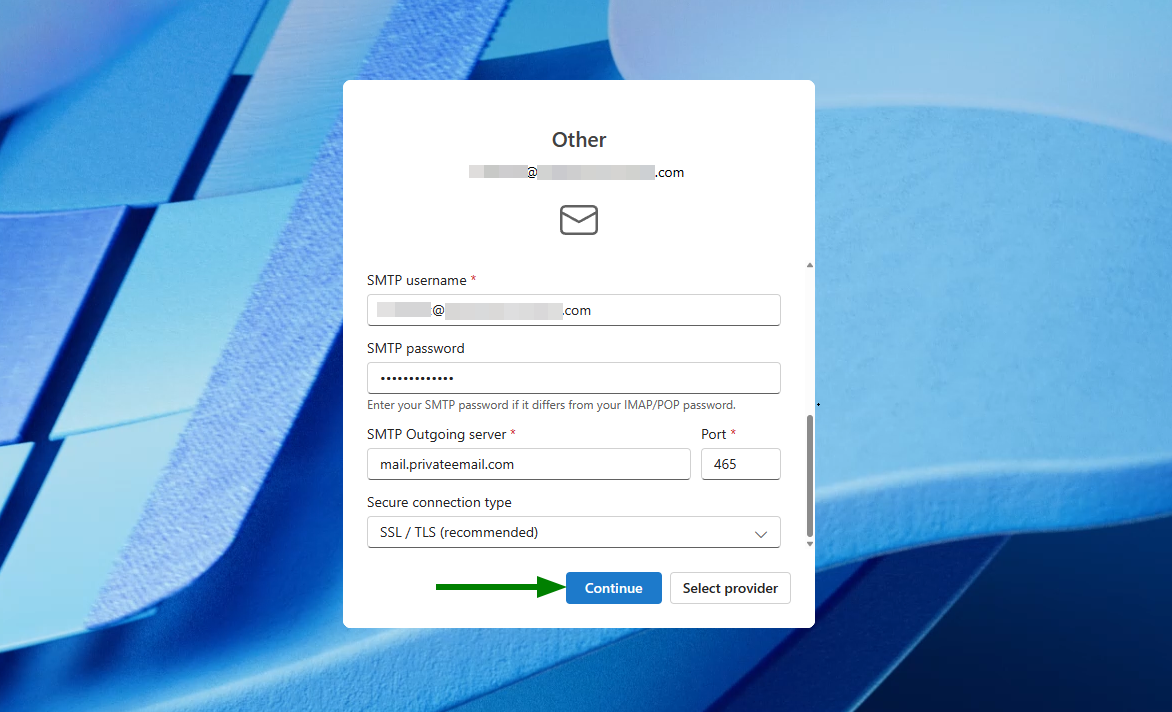
4. Now, enter the following settings carefully:
IMAP/POP Password: Your current mailbox password
IMAP Incoming Server: mail.privateemail.com
Incoming Server Port: 993 (or 143 with StartTLS)
Secure Connection Type: SSL/TLS
SMTP Username: Your full Private Email address
SMTP Password: Your current mailbox password
SMTP Outgoing Server: mail.privateemail.com
Outgoing Server Port: 465 (or 587 with StartTLS)
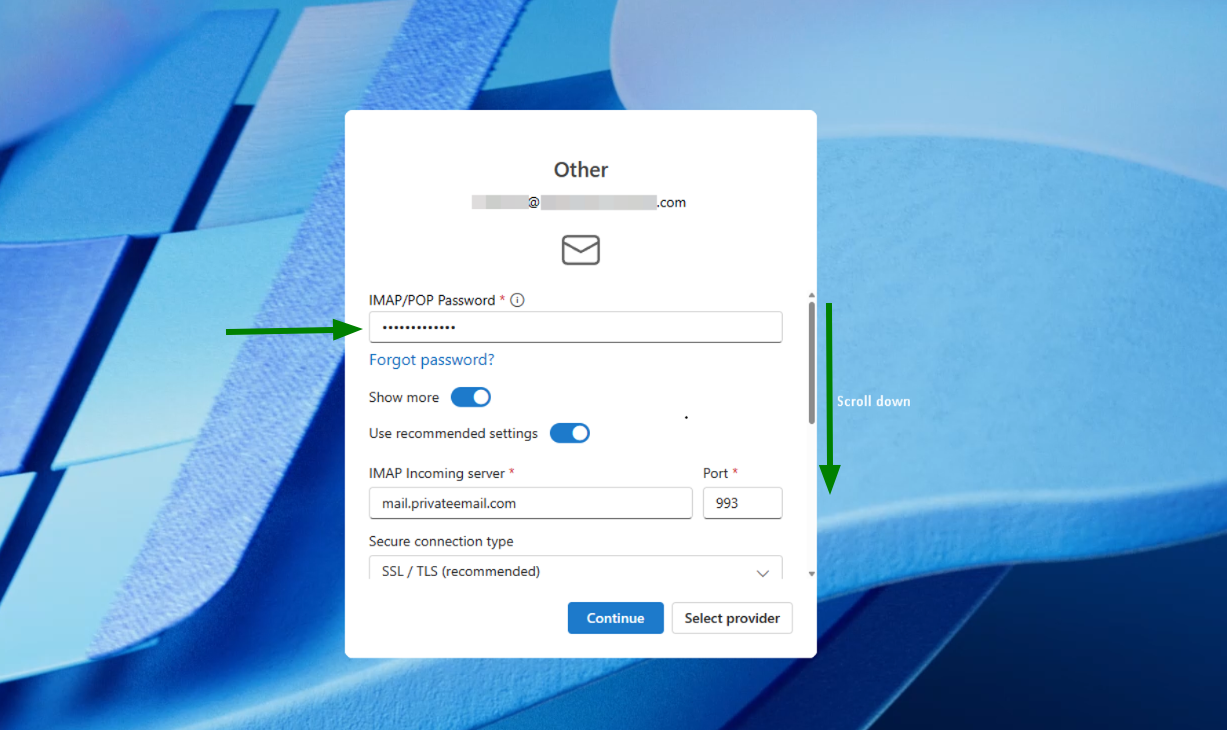
5. Once all details are entered, click Continue to proceed.
6. At this point, a message about Microsoft Cloud will appear:
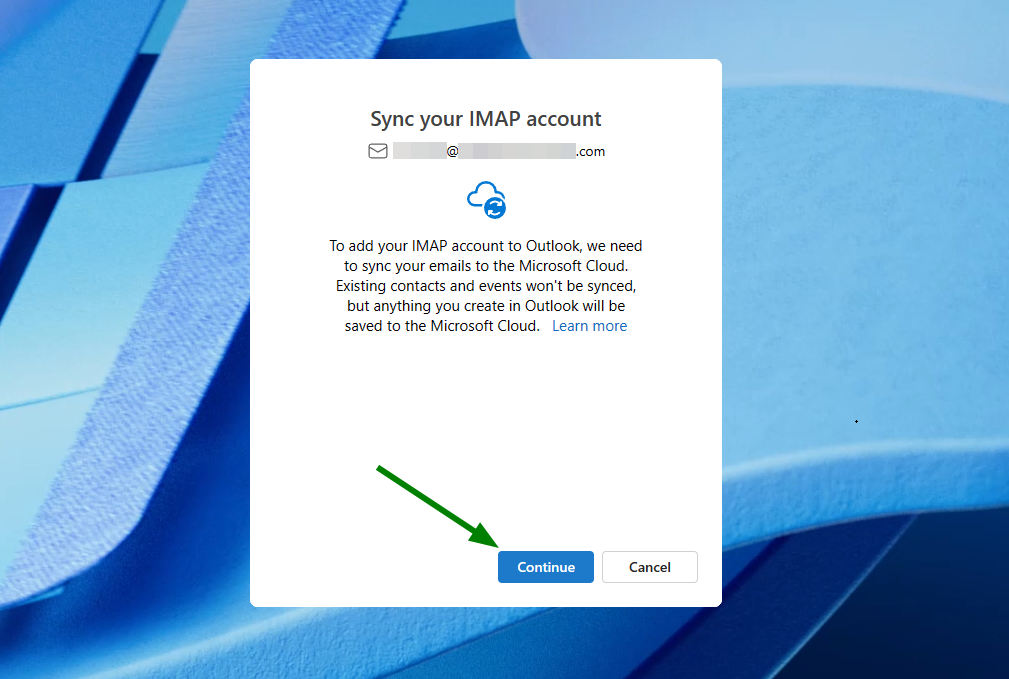
Syncing your account to the Microsoft Cloud means that a copy of your emails will be synchronized between your Private Email server and Microsoft’s data centers.
Before continuing, you may want to review Microsoft’s terms regarding account data:
The Microsoft Services Agreement and the Microsoft Privacy Statement apply to your use of these Outlook versions and your account data.
Additionally, your email provider’s terms of service and privacy policy continue to apply to your account data.
To move forward, press Continue.
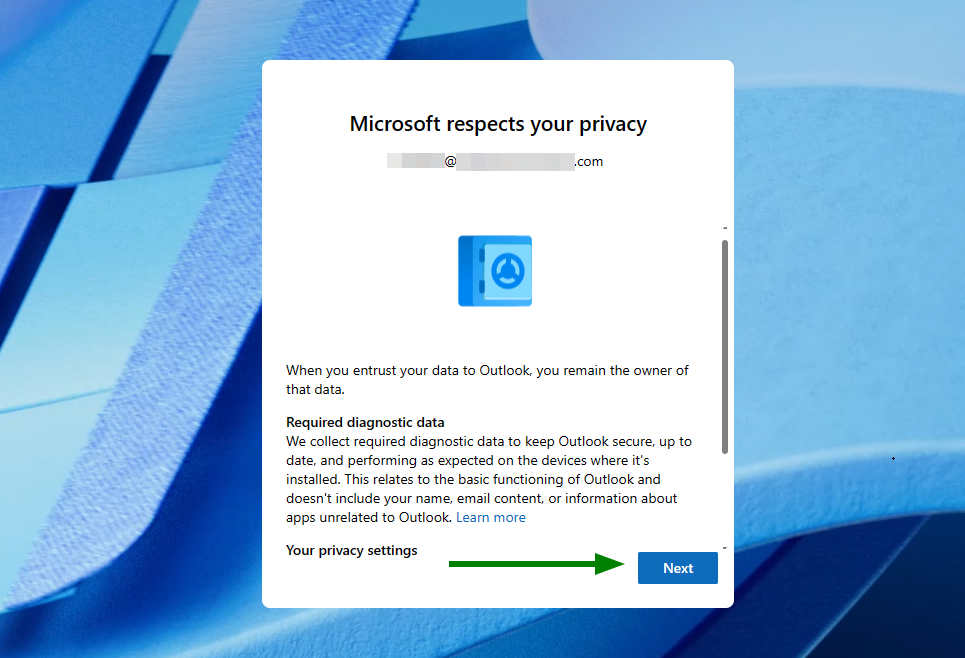
After that, Outlook will navigate to a new privacy-related window. To proceed, press Next.
 8. Finally, to complete the setup, Outlook will ask if it can collect user data for service improvement. Simply select your preference and click Accept.
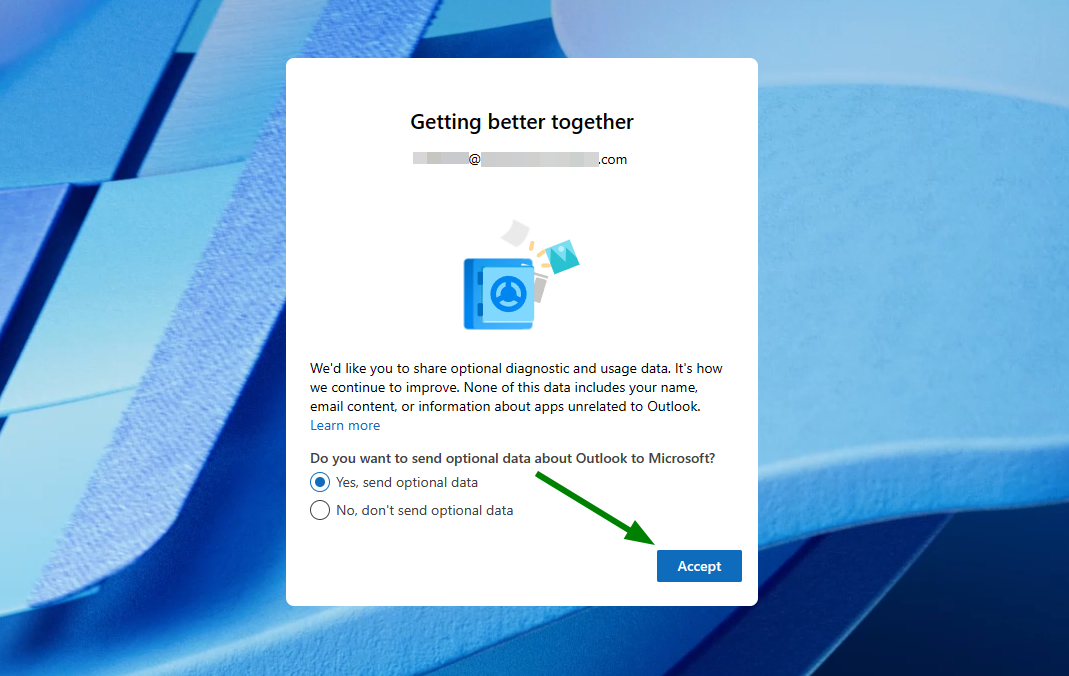
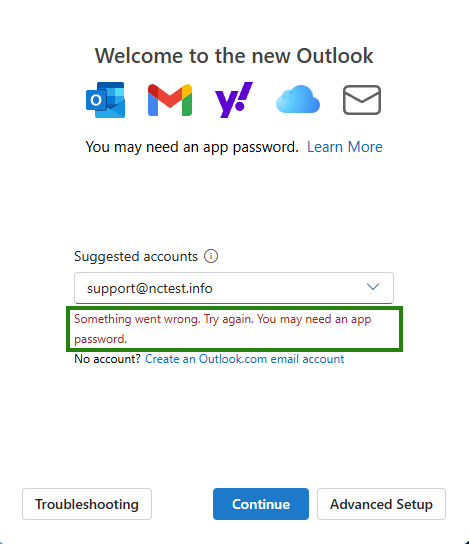
Note: You may encounter the following error during setup:
“Something went wrong. Try again. You may need an app password.”
If this happens, double-check your login details to ensure they are correct.
 Also, you may face the following error during sending emails: “SmtpSubmissionPermanent5XXException: Smtp submission failed. Server ‘mail.privateemail.com’ Port ‘465’. –> Unexpected SMTP server response. Expected: 235, actual: 535, whole response: 535 5.7.8 Error: authentication failed: (reason unavailable)”. In this case, please make sure the password in SMTP settings matches the correct password for the Private Email mailbox.
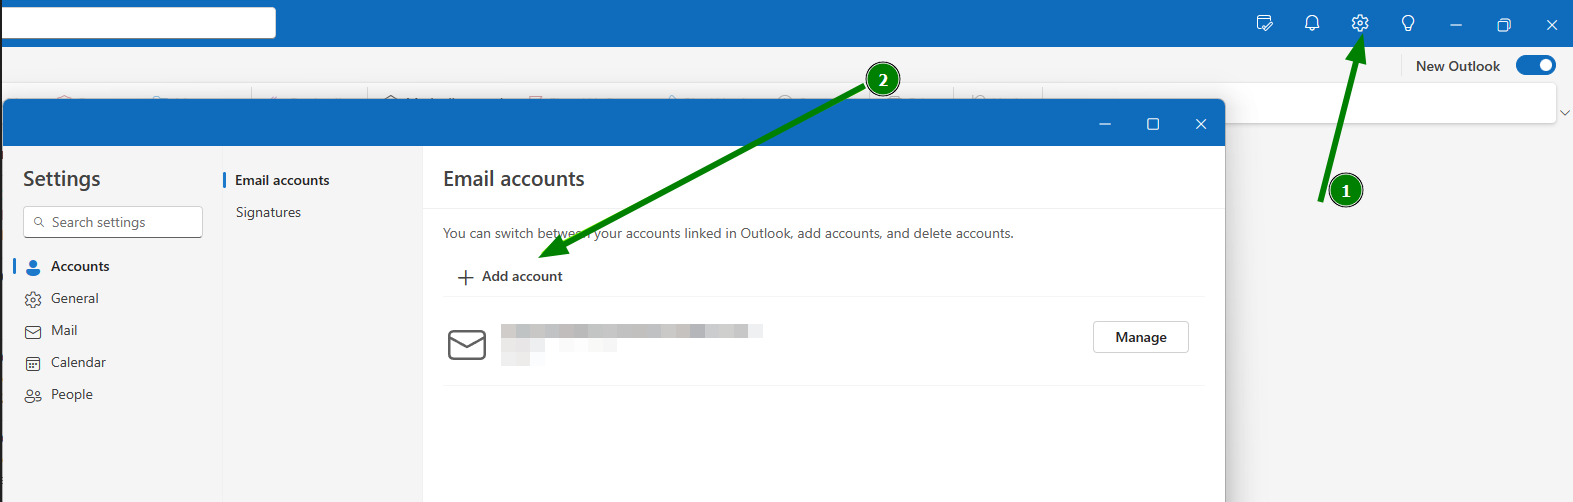
 In order to check or update the configuration of an existing email account, follow these steps:1. Open the Mail application on your device.
2. Click on 3 dots next to your added mailbox and choose the option ‘Manage account’:
In order to check or update the configuration of an existing email account, follow these steps:1. Open the Mail application on your device.
2. Click on 3 dots next to your added mailbox and choose the option ‘Manage account’: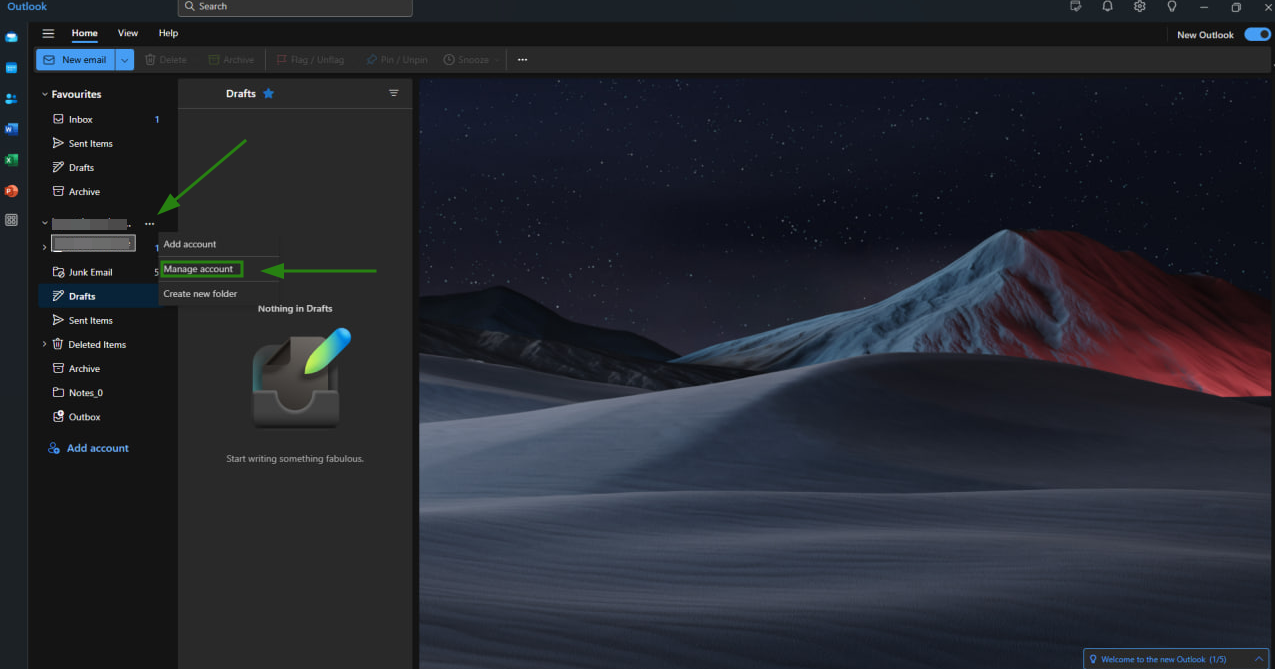 3. Select the mailbox in question and click Manage:
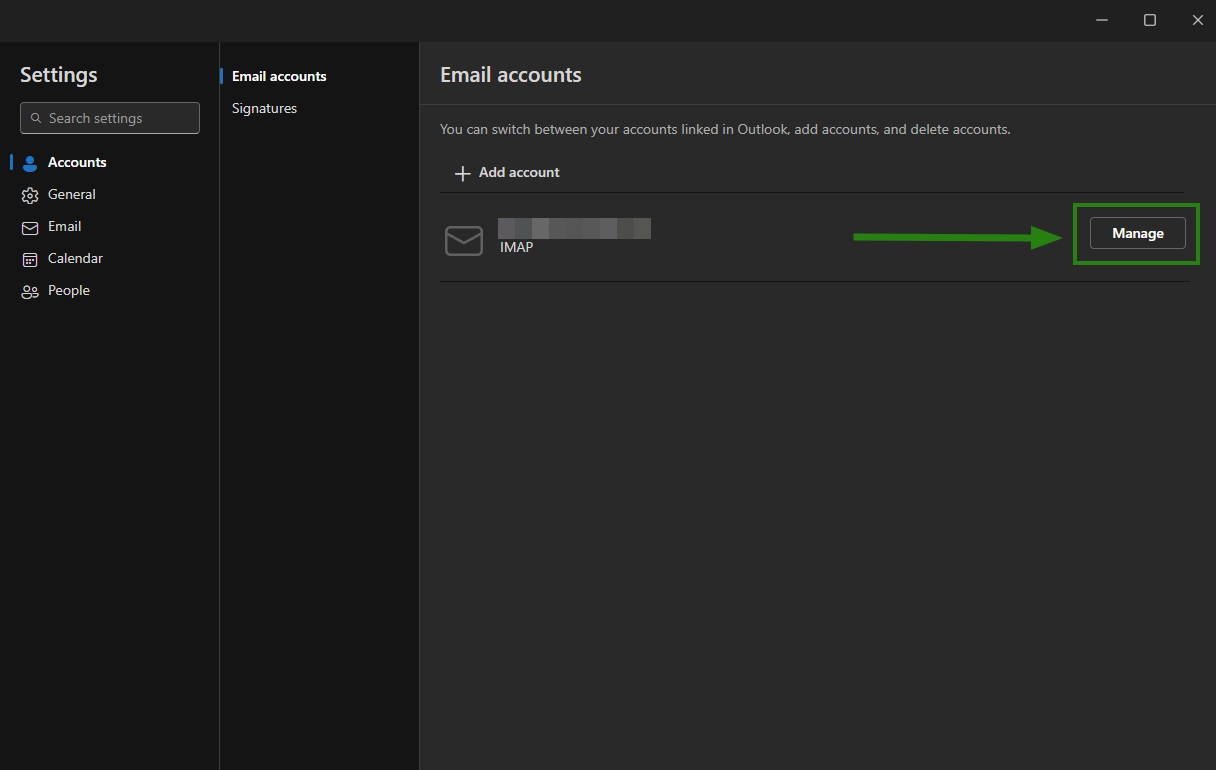 4. Use the slider to scroll to the bottom of the page and you will be able to select the Repair options:
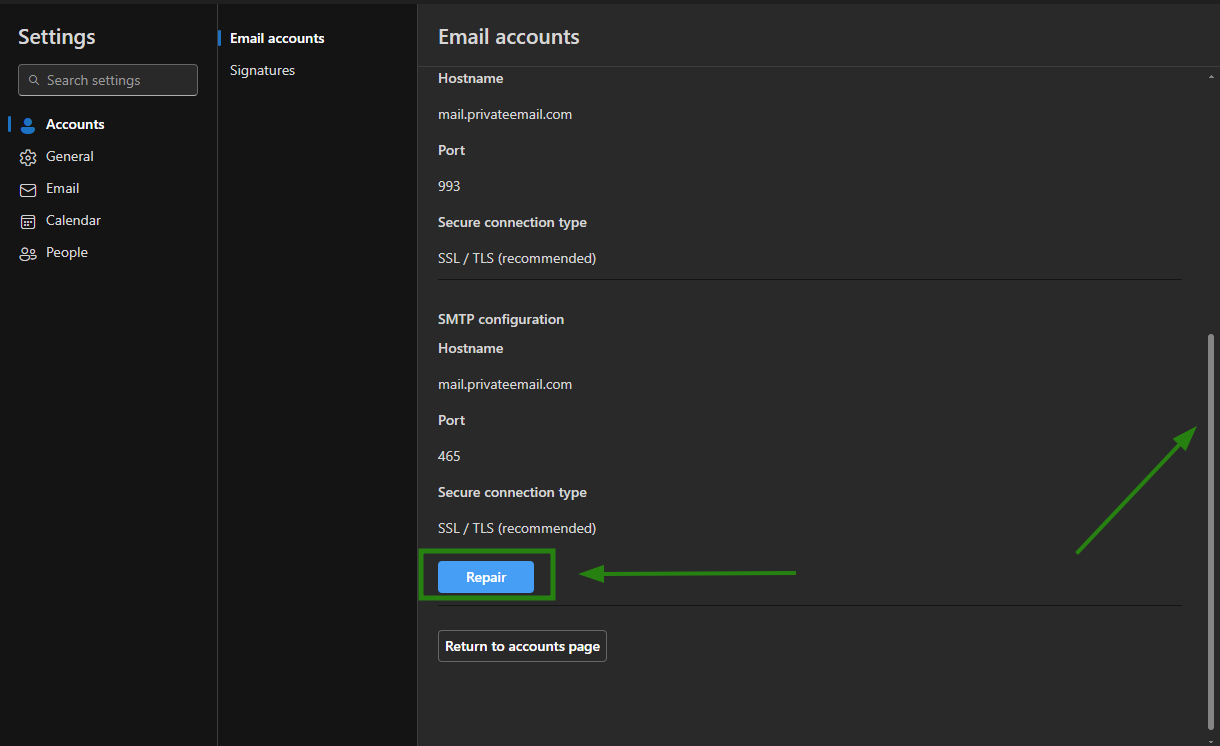 5. On the next page, you will see incoming and outgoing server settings.Make sure all of them are set properly. If any information is set incorrectly, update it for both Incoming mail and Outgoing mail configurations.6. Once all details for the outgoing connection are updated, click Continue:
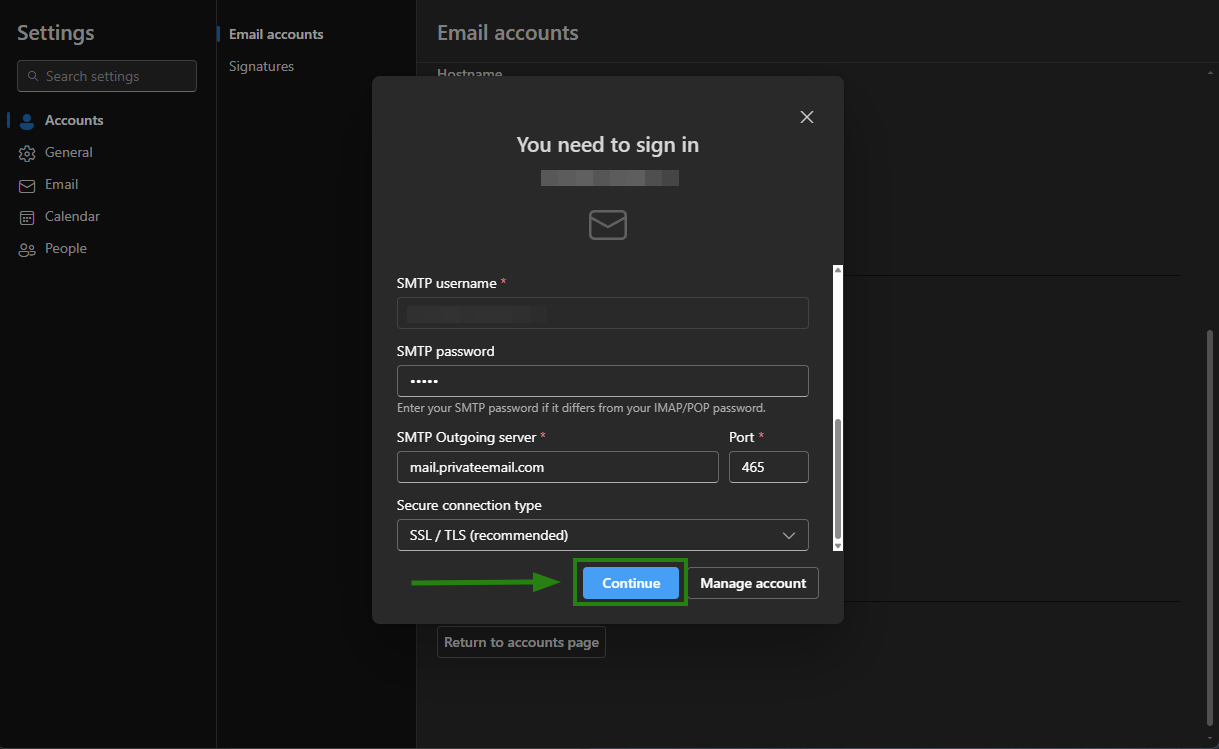 That’s it!If you need specific help with your account, feel free to contact our Support Team. Thank you.